Building a video converter with Rails 6 and FFmpeg
28 Apr 2021Today’s project pulls together a number of built-in Rails tools, plus a couple of incredibly useful open source projects to build a web application that can convert user-uploaded video files to MP4.
To demonstrate some of the modern parts of the standard Rail stack, we’re going to go further than just building a converter. We will enhance the user experience during the upload and conversion process with Active Storage to handle direct file uploads, Action Cable for real-time updates on the video conversion, and Stimulus to dynamically update the DOM without needing a heavy Javascript framework.
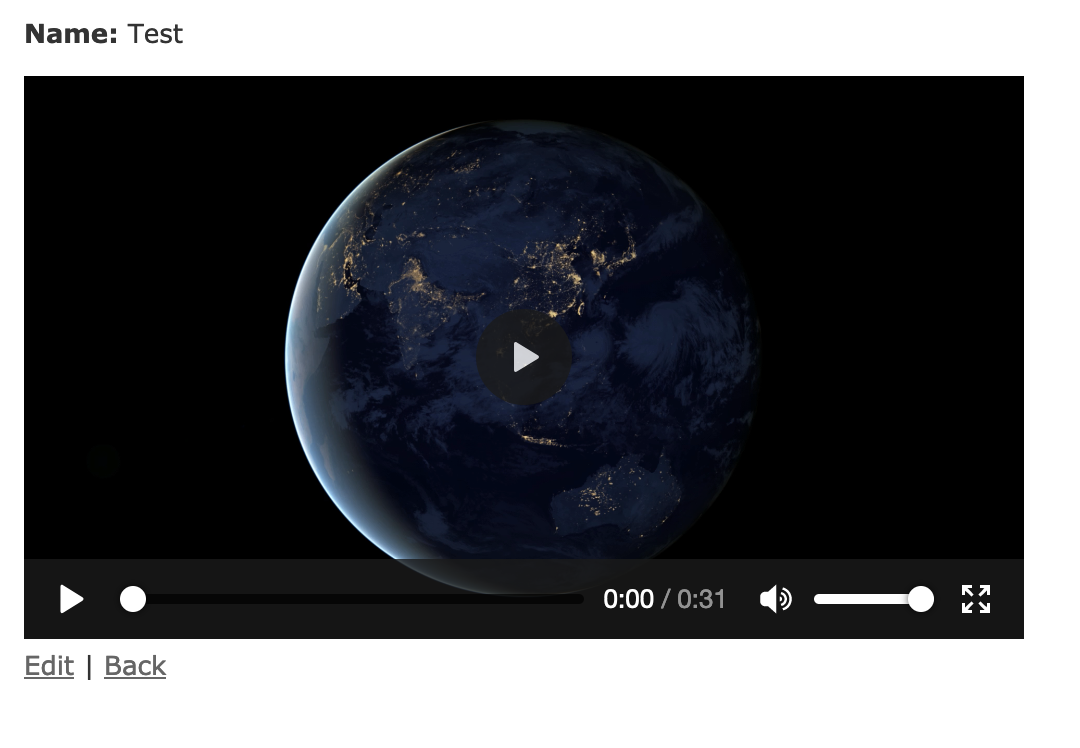
When we’re finished, we’ll have an ugly but fully functional web application that allows a user to upload a video file. After the file is uploaded, we’ll convert the video to MP4 if needed, and then display that converted video to the user. It will look something like this:
This guide assumes that you are comfortable with Ruby on Rails and familiar with Active Storage and Stimulus, but you do not need to be an expert on any of these tools to get value from this guide. We’ll start with a brand new Rails 6 project, however, you can follow along with an existing Rails 6 project if you prefer.
If you use an existing project you may need to complete additional setup steps for Stimulus, Action Cable, and Active Storage that won’t be covered in this guide.
Project setup
To start, let’s create our Rails application using webpack and Stimulus, install Active Storage, add a User scaffold to work from, and migrate our database.
All standard Rails stuff here, hopefully nothing totally new yet!
    rails new upload_progress --webpack=stimulus --skip-coffee --database=postgresql -T
    cd upload_progress
    rails db:create
    rails g scaffold User name:string
    rails active_storage:install
    rails db:migrate
At this point, you can boot your rails server with rails s and visit localhost:3000/users to see the scaffold working as expected. Create a few users if you want. There are no rules here.
Now that the project is setup, let’s get into the fun stuff.
Uploading files with Active Storage
Our user will have a profile video, which we’ll use as the base for exploring video conversion later on in this guide.
To add a profile video, update the User model to add a profile_video backed by Active Storage.
    # app/models/user.rb

    class User < ApplicationRecord
      has_one_attached :profile_video
    end
Thanks to the power of Active Storage we can now just add the profile video to our controller and views and start uploading files right away.
Head to the users form and add a new form field for the video:
    <!-- app/views/users/_form.html.erb -->

    <%= form_with(model: user) do |form| %>
      <% if user.errors.any? %>
        <div id="error_explanation">
          <h2><%= pluralize(user.errors.count, "error") %> prohibited this user from being saved:</h2>

          <ul>
            <% user.errors.each do |error| %>
              <li><%= error.full_message %></li>
            <% end %>
          </ul>
        </div>
      <% end %>

      <div class="field">
        <%= form.label :name %>
        <%= form.text_field :name %>
      </div>

      <div class="field">
        <%= form.label :profile_video %>
        <%= form.file_field :profile_video %>
      </div>

      <div class="actions">
        <%= form.submit %>
      </div>
    <% end %>
Then update the UsersController to add profile_video to the existing user_params method.
    # app/controllers/users_controller.rb

    def user_params
      params.require(:user).permit(:name, :profile_video)
    end
Finally, we want to be able to see the video after we’ve uploaded it. Head to app/views/users/show and add a <video> element to the page.
    <!-- app/views/users/show.html.erb -->

    <video controls>
      <source src="<%= url_for(@user.profile_video) %>">
    </video>
Try it out and make sure that uploading videos works as expected by creating a new user and attaching a video file to the profile_video field.
Stunning. You’re a star.
While this works, we can make the upload experience a little better.
First - when the file upload dialog opens, the user can choose any type of file they like. Let’s add a guardrail to only allow video files to be selected in the upload dialog.
    <!-- app/views/users/_form_.html.erb -->

    <%= form.file_field :profile_video, accept: "video/*" %>
Note that in a real app accept is a nice user experience gain but it does not validate the user’s input. You should always validate the file type on the server! A malicious or curious user can easily change the accept attribute in the browser. For today we can get by with field-level validation on the client.
Adding direct uploads and an upload progress bar
When a user uploads a large file directly to your servers, they are going to find the request takes a long time and, in production, it may frequently time out, block other requests, and cause all kinds of headaches.
We can prevent all of those issues with the direct upload feature built in to Active Storage. Direct upload sends files directly from the user’s client to your chosen cloud storage provider. Direct uploads speed up the upload and keeping the request from timing out or backing up your servers.
Let’s add direct upload to the file field and, as a bonus, add an upload progress bar for the user.
First, confirm that you have ActiveStorage’s javascript added to your application.js file.
    // application.js

    // If you started with a new Rails project, these lines should already be in application.js. If not, add them
    import * as ActiveStorage from "@rails/activestorage"
    ActiveStorage.start()
Now, we need to tell our file field to use the direct upload javascript:
    <!-- app/views/users/_form_.html.erb -->

    <%= form.file_field :profile_video, accept: "video/*", direct_upload: true %>
Refresh your page and confirm that everything works exactly as it did before we added direct upload. Again, Rails makes things really easy.
While our file upload is working and we could leave it as it is, in the real world uploads can take a while, especially when you’re handling large video files. Giving the user feedback as their file uploads is a nice UX win. Let’s add a progress bar to track the file upload using a few sprinkles of Stimulus.
To track upload progress, we’ll listen for the direct-upload:progress event and, each time that event is emitted we’ll use the data in the event to update a progress bar in the UI.
We’ll start with our Stimulus controller, which looks like this:
    // app/javascript/controllers/upload_progress_controller.js

    import { Controller } from 'stimulus'

    export default class extends Controller {
      static targets = [ "progress", "progressText", "progressWidth" ]

      initialize() {
      }

      connect() {
        this.element.addEventListener("direct-upload:progress", this.updateProgress.bind(this))

        this.element.addEventListener("direct-upload:error", event => {
          event.preventDefault()
          const { id, error } = event.detail
          console.log(error)
        })
      }

      showProgress() {
        this.progressTarget.style.display = "block"
      }

      updateProgress() {
        const { id, progress } = event.detail
        this.progressWidthTarget.style.width = `${Math.round(progress)}%`
        this.progressTextTarget.innerHTML = `${Math.round(progress)}% complete`
      }

      disconnect() {
        this.element.removeEventListener("direct-upload:progress", this.updateProgress)
      }
    }
Let’s break this down a little bit - I’m assuming you’ve got a little bit of familiarity with Stimulus here, if you don’t, the Stimulus Handbook is a great starting point.
connect is used to setup our event listener and subscribe to the events we care about - in this case, direct-upload:progress and direct-upload:error
Our progress event listener calls updateProgress and then uses the progress data from the event to update the UI elements that make up our progress bar.
Next we’ll add our progress bar HTML and connect our Stimulus controller to the DOM.
    <!-- app/views/users/_form_.html.erb -->

    <%= form_with(model: user, html: { data: { controller: "upload-progress" } } ) do |form| %>

      <!-- snipped form fields -->

      <div style="display: none;" data-upload-progress-target="progress">
        <div>Uploading your video to our servers: <span id="progressText" data-upload-progress-target="progressText">Warming up...</span></div>
        <div id="progress-bar" style="background: gray; position: relative; width: 200px; height: 20px;">
          <div id="progressWidth" data-upload-progress-target="progressWidth" style="width: 0%; height: 100%; position: absolute; background: green;">
          </div>
        </div>
      </div>

      <div class="actions">
        <%= form.submit "Save", data: { action: "click->upload-progress#showProgress" } %>
      </div>
    <% end %>
There’s a lot here, let’s step through the updates individually.
First, we connect our Stimulus controller to the DOM by adding data: { controller: “upload-progress” } to our form_with
Then, we add our progress bar HTML. Don’t mind all the inline styles, you can use CSS if you like.
    <div style="display: none;" data-upload-progress-target="progress">
      <div>Uploading your video to our servers: <span id="progressText" data-upload-progress-target="progressText">Warming up...</span></div>
      <div id="progress-bar" style="background: gray; position: relative; width: 200px; height: 20px;">
        <div id="progressWidth" data-upload-progress-target="progressWidth" style="width: 0%; height: 100%; position: absolute; background: green;">
        </div>
      </div>
    </div>
The progress bar is hidden when the page loads and we use Stimulus targets on our progress bar container, progress text, and progress width elements. The Stimulus controller uses these targets to update the DOM as direct-upload:progress events are emitted.
Finally, on the form’s submit button, we listen for a click. When the form submit button is clicked, we call upload-progress#showProgress to remove the hidden style from the progress bar container.
Adding the video converter service
Now we’ve got our profile videos uploading nicely and we are informing users of the progress throughout.
Great progress, but we are accepting and displaying any video type and our goal is to build a video converter so that we have a predictable video type on profile videos. For this tutorial, let’s say that our requirements are that all uploaded videos must end up as MP4s.
Before we dive in to the details, let’s review what we want to accomplish at a high level. We want to:
- Allow a user to upload a video file through the User Profile form
- When a video file is uploaded, check the video’s content type
- If the video is already an mp4 file, we don’t need to convert the video - our work is done
- If the video is not an mp4 file, we want to transcode the video from its original type to .mp4
So, how do we accomplish step four? Converting a video on the fly sounds complicated, right?
Enter FFmpeg, an incredibly popular, open source solution for working with video (and audio, if that’s your thing).
While we can work with FFmpeg directly, we’re going to use a gem to make our interaction with FFmpeg a little simpler: streamio-ffmpeg
Let’s start by adding the gem to our project with bundle add streamio-ffmpeg and installing ffmpeg on our system with brew install ffmpeg on a Mac. Other installation options can be found here
With FFmpeg ready, let’s add a service to handle video conversion with mkdir app/services && touch app/services/video_converter.rb
Here’s what the service looks like:
    # app/services/video_converter.rb

    class VideoConverter
      def initialize(user_id)
        @user = User.find(user_id)
      end

      def convert!
        process_video
      end

      private

      def process_video
        @user.profile_video.open(tmpdir: "/tmp") do |file|
          movie = FFMPEG::Movie.new(file.path)
          path = "tmp/video-#{SecureRandom.alphanumeric(12)}.mp4"
          movie.transcode(path, { video_codec: 'libx264', audio_codec: 'aac' })
          @user.profile_video.attach(io: File.open(path), filename: "video-#{SecureRandom.alphanumeric(12)}.mp4", content_type: 'video/mp4')
        end
      end
    end
The important part of the service is the process_video method, so let’s zoom in there.
First, we open the existing profile video attached to the user, so we can access the video’s path.
@user.profile_video.open(tmpdir: "/tmp") do |file|
Next, we create a Movie object with the streamio-ffmpeg gem, using the original file uploaded by the user, which we’re going to transcode shortly.
movie = FFMPEG::Movie.new(file.path)
The path variable assignment is the location where we will create the new, transcoded video. Using this new path and the Movie object, we call the transcode method from the streamio-ffmpeg gem.
Finally, we attach the newly created video to the user, replacing the video that was previously uploaded. Easy!
@user.profile_video.attach(io: File.open(path), filename: "video-#{SecureRandom.alphanumeric(12)}.mp4", content_type: 'video/mp4')
Adding a background job
One more step before we can start converting uploaded videos. Working with video can be time and resource intensive. We don’t want to convert a video during a page turn or block our application servers with expensive video processing.
Let’s add a job that we can use to enqueue video processing jobs in the background. For this tutorial, we’ll use ActiveJob with the default :async adapter, but in production you’ll want to use a real background processor.
Add the job with rails g job convert_video
Our job receives a user id and calls the video converter service for that user, like this:
    class ConvertVideoJob < ApplicationJob
      queue_as :default

      def perform(user_id)
        VideoConverter.new(user_id).convert!
      end
    end
Converting uploaded videos
Now we’re ready to convert videos. In our UsersController, we’ll enqueue the background job in our create and update methods, after the user is saved.
    # app/controllers/users_controller.rb

    def create
      @user = User.new(user_params)

      respond_to do |format|
        if @user.save
          ConvertVideoJob.perform_later(@user.id)
        # snip response boilerplate
        end
      end
    end

    def update
      respond_to do |format|
        if @user.update(user_params)
          ConvertVideoJob.perform_later(@user.id)
        # snip response boilerplate
        end
      end
    end
Now when we upload a profile video, our VideoConverter service will convert the video to mp4 and replace the uploaded video with the newly converted video.
Try it out by uploading any non-mp4 video from the users form. In your server logs you should see output that looks like this if everything is working as expected:
INFO -- : Transcoding of /tmp/ActiveStorage-22-20210428-10611-1wvew4g.mov to tmp/video-9ZrvVFnAZZTJ.mp4 succeeded
But wait a minute. Transcoding can take a while and it happens in the background, so when I upload a video, the show page will render the non-transcoded video until after transcoding is complete. That’s going to cause all kinds of weird bugs, right?
Right.
Let’s get fancy with Action Cable, plus a few more sprinkles of Stimulus to track video conversion progress and render the converted video without a page turn.
Using Action Cable to broadcast video updates
First let’s talk through the problem again at a high level. We want to accomplish something like this:
- When a video is uploaded, check to see if it is an mp4
- If it isn’t, flag the video as needs conversion
- If the video is flagged as needs conversion, don’t render the video element on the user’s show page
- If a video is being processed, communicate that to the user
- If the video has been processed, or did not need to be processed, render the video element on the show page
Let’s start with the logic we skipped in the last section to check if the video needs to be transcoded. Since there’s no point in converting an mp4 to an mp4, we should check the uploaded video’s content type before doing any processing.
If the content type is video/mp4, then we don’t need to transcode the video. If the content type is anything else, flag the video and start converting.
Before we write the logic code, let’s add a boolean value to our User model to track whether the profile video needs to be converted:
rails g migration AddConvertVideoToUsers convert_video:boolean
Migrate your database before moving on rails db:migrate
Now we can add the logic to our controller. In the real world, the controller probably isn’t the right place for this code, but we’re here to learn, so let’s stay focused.
    # app/controllers/users_controller.rb

    def create
      @user = User.new(user_params)
      respond_to do |format|
        if @user.save
          update_conversion_value
          ConvertVideoJob.perform_later(@user.id)
        # snip render logic
        end
      end
    end

    # PATCH/PUT /users/1 or /users/1.json
    def update
      respond_to do |format|
        if @user.update(user_params)
          update_conversion_value
          ConvertVideoJob.perform_later(@user.id)
        # snip render logic
        end
      end
    end

  private
    # snip
    def update_conversion_value
      return unless @user.profile_video

      needs_conversion = @user.profile_video.content_type != "video/mp4"
      @user.update_column(:convert_video, needs_conversion)
    end
The slightly clunky update_conversion_value method checks the content type of the profile video and assigns the appropriate value to the convert_video column.
Now that we’ve got this logic in place, we can head into our converter service and put that logic to use.
    # app/services/video_converter.rb
    def convert!
      return unless @user.convert_video?

      process_video
    end
This change ensures that our video converter doesn’t convert the video unless it has been flagged for conversion.
Next we want to update the value of convert_video after we’ve converted non-mp4 videos. We can do that with a new update_needs_conversion method in our service:
    # app/services/video_converter.rb

    class VideoConverter
      def convert!
        return unless @user.convert_video?

        process_video
        update_needs_conversion
      end

      private

      # Snip

      def update_needs_conversion
        @user.update_column(:convert_video, false)
      end
    end
Now when we upload a video, the converter will return without doing anything if the video is an mp4, otherwise it will convert the video and then update the convert_video flag on the user to false.
With this flag in place, we can add in our Action Cable and Stimulus magic to communicate a video’s conversion status to the user so they can see their uploaded video without refreshing the page.
Let’s remember our goal for this part of the project. We want to:
- Check the video’s conversion status when we render the user show page
- If the video is converted, display the video in a video element
- If the video is not converted, display a placeholder for the video and communicate the video’s conversion status to the user
- When the video finishes converting, automatically update the content of the user’s show page to display the video in a video element
Let’s dig in.
First, we need to generate an Action Cable channel to broadcast from. As usual, Rails comes with a built in converter for this. Use rails g channel VideoConversion to generate the new channel
Update the generated video_conversion_channel.rb file to look like this:
    class VideoConversionChannel < ApplicationCable::Channel
      def subscribed
        stream_from "video_conversion_#{params[:id]}"
      end
    end
This channel is responsible for broadcasting the progress of the video conversion process, updating a percentage complete element in the UI.
Next, let’s add the Stimulus controller that will listen for events from this channel and update the UI as it receives them.
First touch app/javascript/controllers/conversion_progress_controller.js
And then:
    // app/javascript/controllers/conversion_progress_controller.js

    import { Controller } from "stimulus";
    import consumer from "channels/consumer";

    export default class extends Controller {
      static targets = [ "progressText" ]

      initialize() {
        this.subscription = consumer.subscriptions.create(
          {
            channel: "VideoConversionChannel",
            id: this.element.dataset.id,
          },
          {
            connected: this._connected.bind(this),
            disconnected: this._disconnected.bind(this),
            received: this._received.bind(this),
          }
        );
      }

      _connected() {}

      _disconnected() {}

      _received(data) {
        this.updateProgress(data * 100)
      }

      updateProgress = (progress) => {
        let progressPercent = ''
        if (progress >= 100) {
          progressPercent = "100%"
        } else {
          progressPercent = Math.round(progress) + "%"
        }
        this.progressTextTarget.innerHTML = progressPercent
      }
    }
This controller contains a lot of Action Cable boilerplate, don’t let it overwhelm you.
The important parts are the channel we subscribe to in the initialize method and the _received method. When a new message is broadcast on the channel that the user is subscribed to (from the id in the initialize method), _received calls updateProgresswhich updates the DOM with the progress value broadcast by Action Cable.
Let’s wire this controller up to our HTML and start to bring it all together.
We want to subscribe to updates on a particular user, which means we need to update our show view to connect to the ConversionProgress Stimulus controller.
<!-- views/users/show.html.erb -->
<!-- snip -->
<div data-id="<%= @user.id %>" data-controller="conversion-progress" style="max-width: 500px; max-height: 500px;">
<% if @user.convert_video? %>
<div>
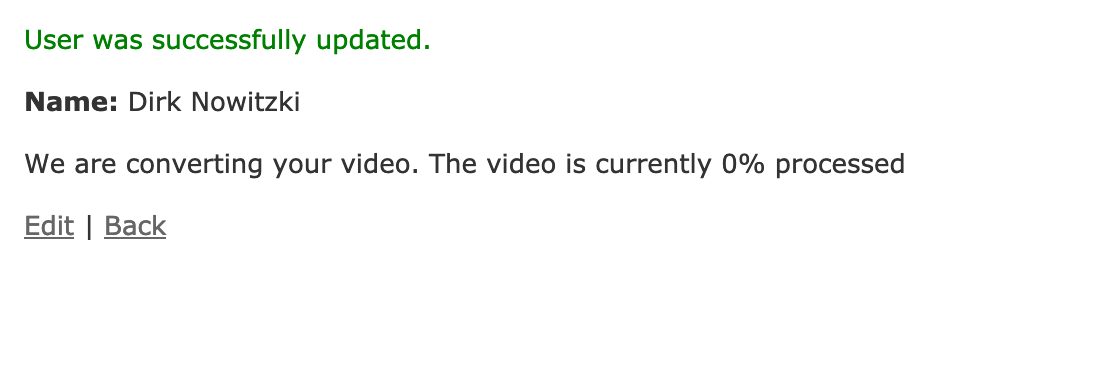
<p>We are converting your video. The video is currently <span data-conversion-progress-target="progressText">0%</span> processed</p>
</div>
<% else %>
<video controls style="max-width: 100%; max-height: 100%;">
<source src="<%= url_for(@user.profile_video) %>">
</video>
<% end %>
</div>
<!-- snip -->
Here we’ve added a data-id and a data-controller to the video’s parent video. data-id is used by the Stimulus controller to know which channel to subscribe to updates from, and the data-controller is used to connect the Stimulus controller to the DOM.
The other change here is adding logic to display the video as-is when the video has been converted, otherwise, we render text that our Stimulus controller will update as it receives updates from Action Cable.
After making these changes, if you upload a new non-mp4 video to a user and visit the show page, you’ll see the “We are converting your video” text but the percentage processed will never update. That is because we aren’t yet broadcasting the conversion progress to the Action Cable channel.
Fortunately, the FFmpeg gem makes broadcasting progress really simple. Let’s update the transcode call in our video converter service to broadcast the change:
movie.transcode(path, { video_codec: 'libx264', audio_codec: 'aac' }) { |progress| ActionCable.server.broadcast("video_conversion_#{@user.id}", progress) }
Now we’ll see our progress text count up from 0% to 100% when we upload a new video that needs conversion. Depending on the video’s properties and your computer’s power, this might be a very fast process or it could take several minutes. Either way, you can now watch the progress in real time!
When the percentage gets to 100% you’ll notice one final issue blocker that we need to solve. Instead of replacing the video placeholder with the actual video when it reaches 100% conversion, the counter just stays there and the user has to refresh the page to see the video. We can fix that with a little more Action Cable, and a little more Stimulus.
First, add another Action Cable channel with rails g channel ConvertedVideo and update the subscribed method in the generated _channel.rb file:
    class ConvertedVideoChannel < ApplicationCable::Channel
      def subscribed
        stream_from "converted_video_#{params[:id]}"
      end
    end
Then add a new Stimulus controller for subscribing to the channel and managing updates with touch app/javascript/controllers/converted_video_controller.js
And add the code to subscribe and handle broadcasts on the ConvertedVideo channel.
    // javascript/controllers/converted_video_controller.js

    import { Controller } from "stimulus";
    import consumer from "channels/consumer";

    export default class extends Controller {
      static targets = ["videoContainer"];

      initialize() {
        this.subscription = consumer.subscriptions.create(
          {
            channel: "ConvertedVideoChannel",
            id: this.element.dataset.id,
          },
          {
            connected: this._connected.bind(this),
            disconnected: this._disconnected.bind(this),
            received: this._received.bind(this),
          }
        );
      }

      _connected() {}

      _disconnected() {}

      _received(data) {
        const videoElement = this.videoContainerTarget
        videoElement.innerHTML = data
      }
    }
This Stimulus controller is very similar to the last controller. In it, we subscribe to the ConvertedVideoChannel with the user id. When data is broadcast on the channel, the Stimulus controller looks for a videoContainer DOM element and replaces the content of that element with the data sent from Action Cable. We’ll see what that data looks like next.
Our goal here is to replace the container of the video placeholder element with the actual video once it has been processed. We can do this with Action Cable by taking advantage of the fact that we can render a view partial to a string and broadcast that string from Action Cable, making it easy to replace DOM content with HTML broadcast in a message.
To start, let’s add a partial that renders the video element, and add that to our the view. While we’re in the show view, we’ll also connect the new Stimulus controller to the DOM.
First run touch app/views/users/_profile_video.html.erb in your terminal and then:
    <!-- views/users/_profile_video.html.erb -->

    <video controls style="max-width: 100%; max-height: 100%;">
      <source src="<%= url_for(user.profile_video) %>">
    </video>
    <!-- views/users/show.html.erb -->

    <div data-id="<%= @user.id %>" data-controller="conversion-progress converted-video" data-converted-video-target="videoContainer" style="max-width: 500px; max-height: 500px;">
      <% if @user.convert_video? %>
        <div>
          <p>We are converting your video. The video is currently <span data-conversion-progress-target="progressText">0%</span> processed</p>
        </div>
      <% else %>
        <%= render "profile_video", user: @user %>
      <% end %>
    </div>
Now we’ve moved the video element to a partial, and updated our show view to render the partial when the video does not need to be converted.
Take note of the first line above. We’ve added the new converted-video Stimulus controller to the video container’s data-controller attribute. This connects the controller to the DOM and ensures that visitors to the show page are subscribed to the ConvertedVideo channel. We’ve also added a data-converted-video-target attribute to the same <div>. This target is used by the Stimulus controller to replace the progress text with the video element.
The last step is to update the VideoConverter service to broadcast a message containing the profile_video partial on the ConvertedVideo channel after the video has been converted.
    # app/services/video_converter.rb

    def convert!
      return unless @user.convert_video?

      process_video
      update_needs_conversion
      render_processed_video
    end

  private

    # Snip
    def render_processed_video
      partial = ApplicationController.render(partial: "users/profile_video", locals: { user: @user })
      ActionCable.server.broadcast("converted_video_#{@user.id}", partial)
    end
Here we’re calling a new render_processed_video method from our convert! method. This method renders a partial to a string and then broadcasts that string as data, to be picked up and used by our Stimulus controller. Magic.
Let’s see it in action.
Wrapping up
Thanks for making it through this guide! You can find the full source code for this guide on Github.
To recap, today we started with a fresh Rails 6 application. With the power of Stimulus, Active Storage, Action Cable and, most importantly, FFmpeg, we built an app that can convert a user-uploaded video file to mp4 when needed. While the file is converting, we communicate the progress to the user and display the converted user to them without asking them to reload the page.
To make the code in this tutorial production-ready, besides cleaning up the code and styling things, you should spend time validating file uploads from the user, add a real background job processor, and add error-handling and resilience to the video conversion service.
You might also add validation for file size to the videos, on both the client and server, and consider more efficient methods for converting videos to mp4 with more powerful FFmpeg functionality.
Further resources and contact info
If you’d like to see a production version of this project, take a look at the demo for Vestimonials, the product I’m building when I’m not writing technical articles like this one.
If you have questions or feedback on this article, you can find me on Twitter
Thanks for reading!