Server-rendered modal forms on Rails with CableReady, Mrujs, Stimulus, and Tailwind
09 Sep 2021The Rails ecosystem continues to thrive, and Rails developers have all the tools they need to build modern, reactive, scalable web applications quickly and efficiently. If you care about delivering exceptional user experiences, your options in Rails-land have never been better.
Today we’re going to dive into this ecosystem to use two cutting edge Rails projects to allow users to submit forms that are rendered inside of a modal.
The form will open in a modal with content populated dynamically by the server, the server will process the form submission, and the DOM will updated without a full-page turn.
To accomplish this, we’ll use Stimulus for the front-end interactivity, CableReady’s brand new CableCar feature to send content back from the server, and Mrujs to enable AJAX requests and to automatically process CableCar’s operations.
It’ll be pretty fancy.
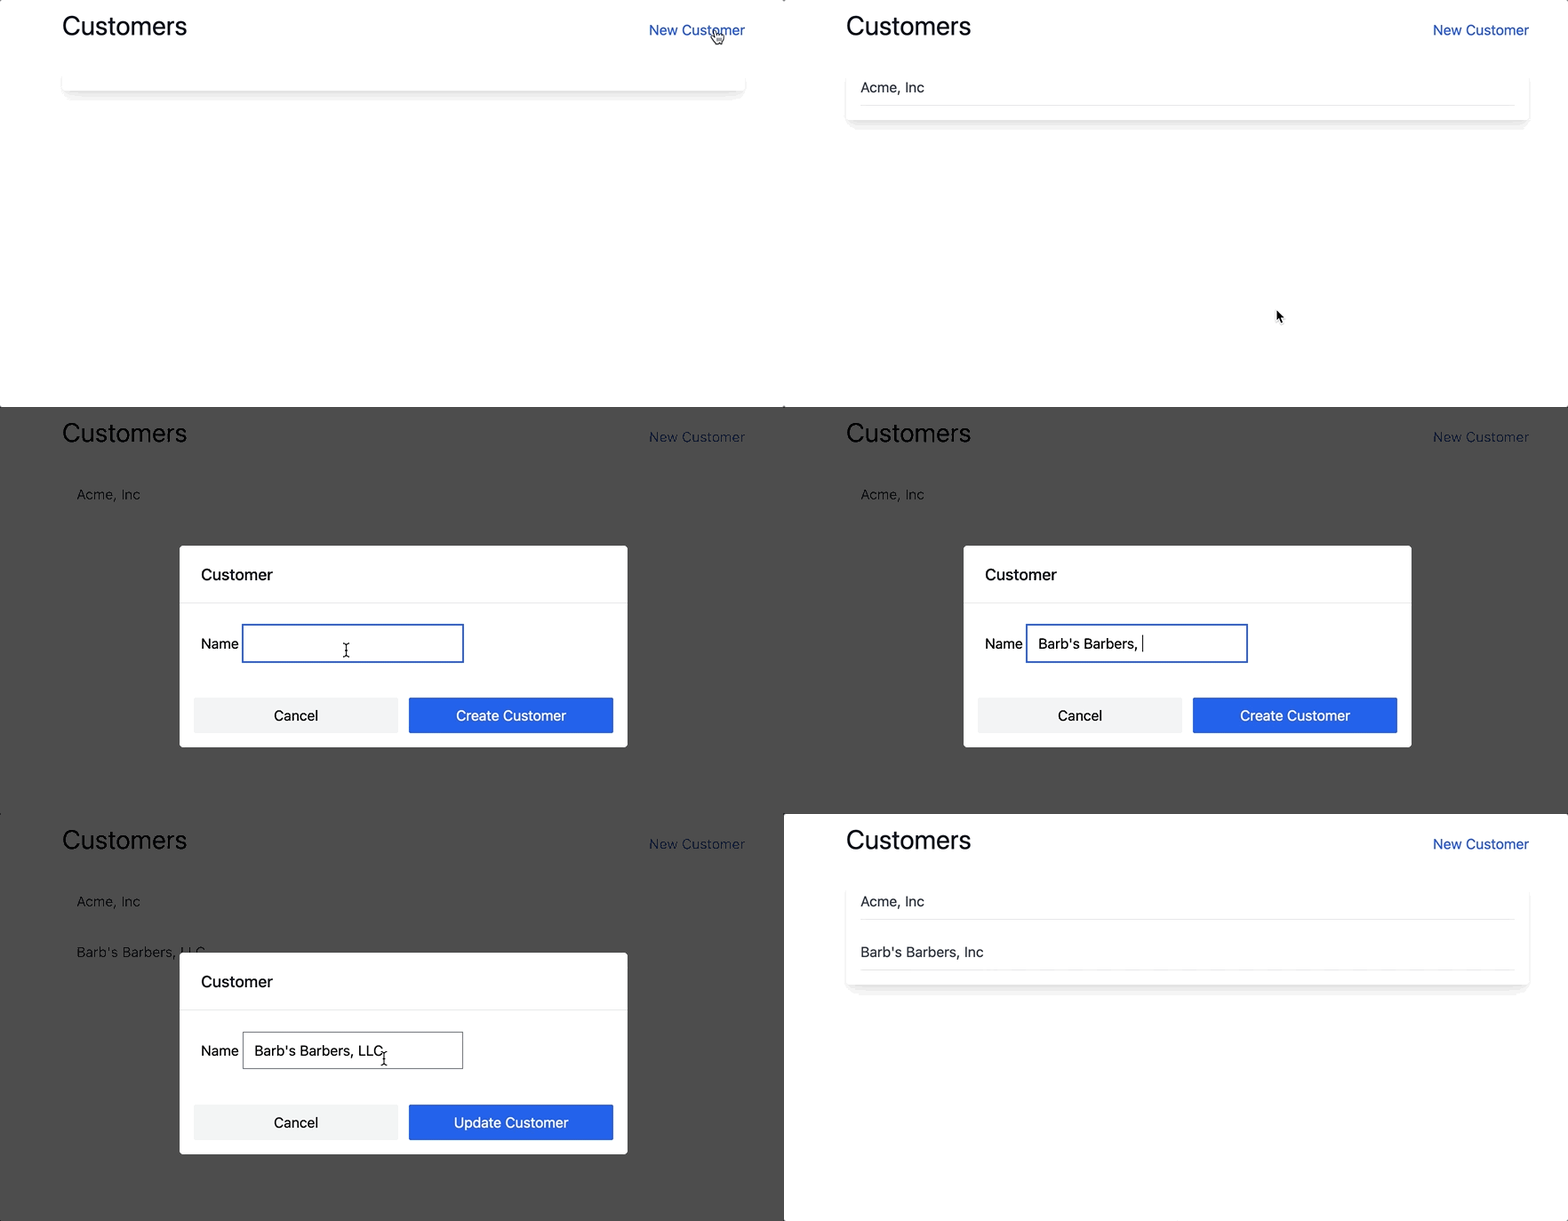
When we’re finished, our application will look like this:

This article includes a fair amount of JavaScript and assumes a solid understanding of the basics of Ruby on Rails.
If you’ve never used Rails before, this article might move a little too quickly for you. While comfort with Rails and JavaScript are needed, you don’t need to have any prior experience with CableReady or Stimulus.
As usual, you can find the complete source code for this article on Github.
Let’s dive in!
Setup
If you prefer to skip the setup steps and jump right in to coding, you can clone the main branch of this repo and then scroll down to the Customers Layout section.
To get everything installed, we’re going to walk on the wild side by using the newly released, very-much-still-alpha jsbundling-rails and cssbundling-rails gems.
First, we’ll create a Rails application and use the alpha js/cssbundling gems to install Webpack and Tailwind, from your terminal:
rails new tiny_crm --skip-webpack-install --skip-javascript
cd tiny_crm
bundle add jsbundling-rails cssbundling-rails
rails javascript:install:webpack
rails css:install:tailwind
bin/devNote that these gems are VERY new, if you bump into errors, check the documentation to see if commands have changed or reach out to me and let me know what error you’re encountering.
With Webpack and Tailwind installed, next we’ll install the core dependencies for this guide, Stimulus, CableReady (plus Action Cable), and Mrujs, from your terminal:
bundle add hotwire-rails
be rails hotwire:installAnd then update your Gemfile to pull in the latest cable_ready.
gem "cable_ready", github: "stimulusreflex/cable_ready"Note that if you’re reading this in the future, we’re using 5.0 for this guide.
And then from your terminal:
bundle
yarn add mrujs cable_ready @rails/actioncableNext, update app/javascript/packs/application.js like this, to pull in the new dependencies and configure Mrujs to use its CableCar plugin.
import "./controllers"
import mrujs from "mrujs";
import CableReady from "cable_ready"
import { CableCar } from "mrujs/plugins"
import * as Turbo from "@hotwired/turbo"

window.Turbo = Turbo;

mrujs.start({
  plugins: [
    new CableCar(CableReady)
  ]
})That’s a lot of dependencies to setup. Do we really need all of this to display a modal? No, no not really.
The techniques we’ll use in this article only require Action Cable (a core Rails library), CableReady, and Mrujs.
Tailwind and Stimulus are requirements to follow along with the guide step-by-step, but we’re just using them to do things that can be done with your own CSS and vanilla JavaScript, if that’s your preference.
Ultimately, the only UI component you need is a modal that can open and close. Stimulus and Tailwind are a simple way to get there, but they’re not the only way!
Moving on, to wrap up the copy/pasting setup work, we’ll be creating and editing Customers in this application, so let’s scaffold up that resource:
rails g scaffold Customer name:string
rails db:migrateSetup is complete! Great work so far. Now we can start writing code.
Customers layout
First, we’ll apply some basic styling to the customers index page:
<div class="max-w-3xl mx-auto mt-8">
  <div data-controller="modal" class="flex justify-between items-baseline mb-6">
    <h1 class="text-3xl text-gray-900">Customers</h1>
    <%= link_to 'New Customer', new_customer_path, class: "text-blue-600", data: { action: "click->modal#open" } %>
    <%= render 'modal' %>
  </div>
  <div id="customers" class="flex flex-col items-baseline space-y-6 p-4 shadow-lg rounded">
    <% @customers.each do |customer| %>
      <%= render "customer", customer: customer %>
    <% end %>
  </div>
</div>The index view renders a list of customers, plus a header that includes a link to create a new customer.
The header container div includes a controller="modal" data attribute which is a reference to a Stimulus controller that doesn’t exist yet. Likewise, the new customer link references the same modal controller in its data-action attribute.
We’ll create that controller soon, for now though, clicking on the new customer link will navigate the browser to customers/new
The index view also renders two partials that don’t exist yet, modal and customer. Let’s create and fill those in next so that we can render the index page again.
First, the customer partial:
touch app/views/customers/_customer.html.erbThe customer partial just renders the customer’s name for now:
<div class="text-gray-700 border-b border-gray-200 w-full pb-2">
  <%= customer.name %>
</div>Next create the modal partial:
touch app/views/customers/_modal.html.erbAnd fill that in:
<div data-modal-target="container"
     class="hidden fixed inset-0 overflow-y-auto flex items-center justify-center"
     style="z-index: 9999;">
  <div class="max-w-lg max-h-screen w-full relative">
    <div class="m-1 bg-white rounded shadow">
      <div class="px-4 py-5 border-b border-gray-200 sm:px-6">
        <h3 class="text-lg leading-6 font-medium text-gray-900">
          Customer
        </h3>
      </div>
      <form id="customer_form"></form>
    </div>
  </div>
</div>The important items here are the modal-target="container" data attribute, which the Stimulus controller will use to open/close the modal and the empty <form> element.
This form element will eventually be filled in with content from the server when the user opens the modal.
With the index markup in place and your server running via bin/dev, head to http://localhost:3000/customers and make sure everything is displaying as expected.
Next we will create the modal Stimulus controller and fill it in with content rendered from the server. I’m excited too.
Showing the new customer modal
First we need to create a new Stimulus controller:
rails g stimulus modalAnd fill the controller in with:
// Credit: This controller is an edited-to-the-essentials version
// of the modal component created by @excid3 as part of the essential
// tailwind-stimulus-components package found here:
// https://github.com/excid3/tailwindcss-stimulus-components

// In production, use the full component from the
// library or expand this controller to allow for
// keyboard closing and dealing with scroll positions

import { Controller } from "@hotwired/stimulus"

export default class extends Controller {
static targets = ['container'];

  connect() {
    this.toggleClass = 'hidden';
    this.backgroundId = 'modal-background';
    this.backgroundHtml = this._backgroundHTML();
    this.allowBackgroundClose = true;
  }

  disconnect() {
    this.close();
  }

  open() {
    document.body.classList.add('fixed', 'inset-x-0', 'overflow-hidden');
    this.containerTarget.classList.remove(this.toggleClass);
    document.body.insertAdjacentHTML('beforeend', this.backgroundHtml);
    this.background = document.querySelector(`#${this.backgroundId}`);
  }

  close() {
    if (typeof event !== 'undefined') {
      event.preventDefault()
    }
    this.containerTarget.classList.add(this.toggleClass);
    if (this.background) { this.background.remove() }
  }

  _backgroundHTML() {
    return `<div id="${this.backgroundId}" class="fixed top-0 left-0 w-full h-full" style="background-color: rgba(0, 0, 0, 0.7); z-index: 9998;"></div>`;
  }
}There’s a lot of JavaScript here, but it isn’t doing anything too fancy.
In connect, we set default values the controller needs to function.
open simply applies classes to the body and the modal container to make the modal visible on the screen and apply the standard grayed-out background to the rest of the page.
When close is called, the background is removed and the modal is hidden.
If you decide to use this approach in a real project, consider using the Stimulus component this code is derived from. The above code was edited for brevity and the edits will introduce issues with scrolling and accessibility that the full component handles cleanly.
With the Stimulus controller created, we’re almost ready to render the modal. Before we proceed, let’s step back and make sure we’re clear on what we want to achieve.
Our goal is to create a server-rendered modal that allows a user to create a new customer. After the form in the modal is submitted, the newly created customer should be inserted into the list of customers, and the modal should close.
The first task is to open the modal and display the content from the server, which means that when a user clicks on the New Customer link on the index page:
- A request should be made to the server to retrieve the content for the customer form
- The content should replace the empty customer form that the modal partial renders on the initial page load
- The modal should open
This will be easier than it sounds.
We’ll use Mrujs to make an AJAX request to customers#new, we’ll queue up operations with CableCar, and Mrujs will automatically process those operations for us.
First we need to tell Mrujs to convert the New Customer link to a CableCar-enabled link.
As described in the documentation, we’ll do that by updating the link on the index page like this:
<%= link_to 'New Customer', new_customer_path, class: "text-blue-600", data: { action: "click->modal#open", remote: true } %>Here we’ve added data-remote="true" to the link. Once we do this Mrujs takes care of the rest for us by adding a special cable-ready Accept header when the link is clicked.
With this change in place, when the user clicks on the New Customer link, a request will be sent to customers#new that our controller will (eventually) respond to with Cable Ready operations.
Since we’re going to be rendering the form partial shortly, let’s go ahead and update that partial now:
<%= form_with(model: customer, id: "customer_form") do |form| %>
  <div class="px-4 pt-5 pb-4 sm:p-6 sm:pb-4">
    <% if customer.errors.any? %>
      <div class="p-4 border border-red-600">
        <h2>
          Could not save customer
        </h2>
        <ul>
          <% customer.errors.full_messages.each do |message| %>
            <li><%= message %></li>
          <% end %>
        </ul>
      </div>
    <% end %>

    <div class="form-group">
      <%= form.label :name %>
      <%= form.text_field :name %>
    </div>

  </div>
  <div class="rounded-b mt-6 px-4 sm:grid sm:grid-cols-2 sm:gap-3 sm:grid-flow-row-dense">
    <%= form.button class: "w-full sm:col-start-2 bg-blue-600 px-4 py-2 mb-4 text-white rounded-sm hover:bg-blue-700" %>
    <button data-action="click->modal#close" class="mt-3 w-full sm:mt-0 sm:col-start-1 mb-4 bg-gray-100 hover:bg-gray-200 rounded-sm px-4 py-2">
      Cancel
    </button>
  </div>
<% end %>Most of this is standard Tailwind classes to apply some light styling to the form.
The important pieces are the id of the form, assigned on line 1, and the data-action assigned to the close button, which fires the close function we defined in the modal Stimulus controller earlier.
We can also make the form look nicer with Tailwind’s form plugin. This is optional, but if you’d like to use it, first install it with yarn, from your terminal:
yarn add @tailwindcss/formsThen update tailwind.config.js:
module.exports = {
  mode: 'jit',
  purge: [
    './app/views/**/*.html.erb',
    './app/helpers/**/*.rb',
    './app/javascript/**/*.js'
  ],
  plugins: [
    require('@tailwindcss/forms')
  ]
}Next we need to update the new method in the CustomersController to render CableReady operations, using the newly introduced CableCar. To do that, we’ll make two changes to the CustomersController.
First update the controller to include CableReady::Broadcaster to give the controller access to cable_car:
class CustomersController < ApplicationController
  include CableReady::Broadcaster
  # snip
endFeel free to place the include in ApplicationController if you prefer.
Then update the CustomersController new method as follows:
def new
    html = render_to_string(partial: 'form', locals: { customer: Customer.new })
    render operations: cable_car
      .outer_html('#customer_form', html: html)
endHere we’re rendering the form partial to a string which we then pass to cable_car and use in an outer_html operation, targeting the (currently empty) customer form.
With all this in place, head back to http://localhost:3000/customers and click on the New Customer link. If all has gone well, you should see the modal open and the customer form render.
Incredible work so far.
Next up we’ll use this same CableCar approach to handle form submissions.
Submitting the form
This section is going to look pretty familiar. We’ll start by updating the customer form with the remote data attribute, just like we added to the new customer link in the last section:
<%= form_with(model: customer, id: "customer_form", data: { remote: true }) do |form| %>Again, this tells Mrujs to submit the form with an AJAX request and to expect CableReady operations to perform in response.
Next, head back to customers_controller.rb and update the create method:
def create
  @customer = Customer.new(customer_params)

  if @customer.save
    html = render_to_string(partial: 'customer', locals: { customer: @customer })
    render operations: cable_car
      .append('#customers', html: html)
  else
    # TODO: Handle errors
  end
endHere we’re again rendering a partial to a string and passing that string to an operation (this time, append). The target is the list of the customers rendered in the customers index view, where the newly created customer will be added to the bottom of the list. If you prefer, use prepend to add the customer to the top of the list instead.
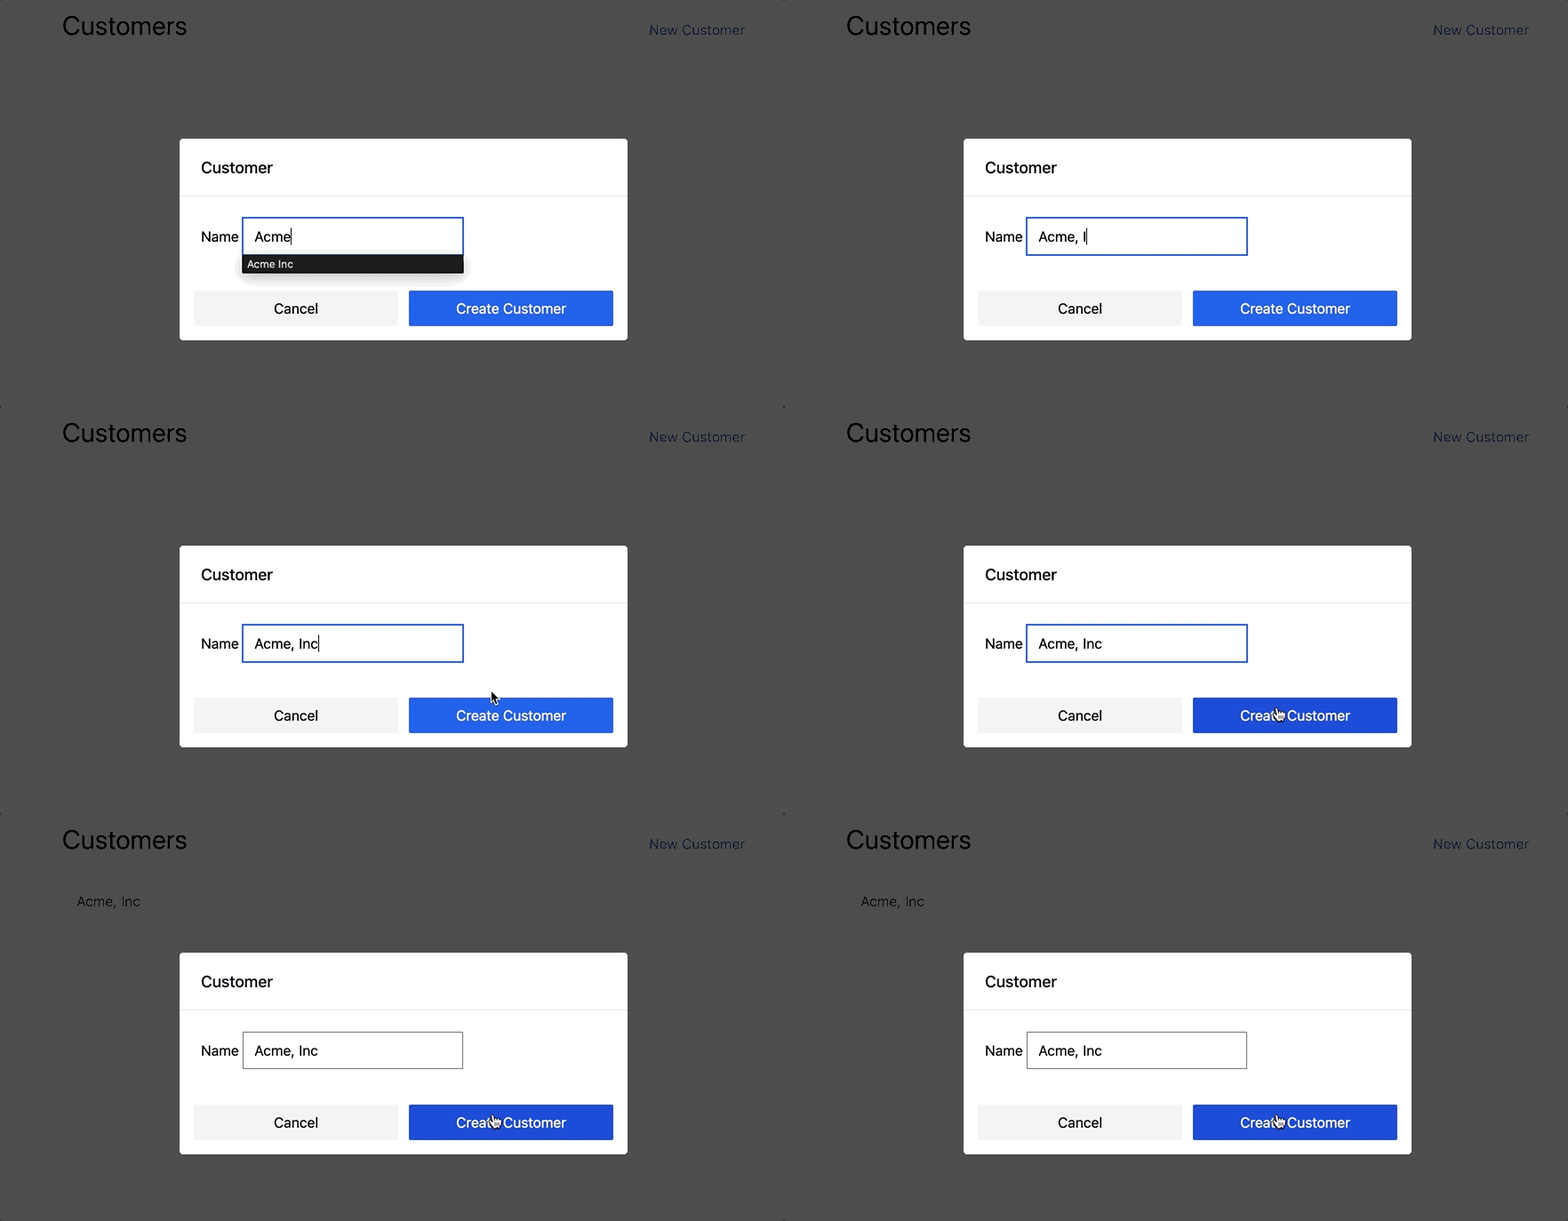
With this in place, open up the modal, type in a name, and submit the form. You should see the newly created customer get appended to the list like expected but the modal doesn’t close.
That’s not ideal.

How do we close the modal when the form submission is successful? By tapping into some of what makes CableReady so powerful — chaining operations and emitting custom DOM events.
To make this work, we’ll first add another operation to the operations chain sent back to Mrujs:
def create
    # snip
    render operations: cable_car
      .append('#customers', html: html)
      .dispatch_event(name: 'submit:success')
endThe dispatch_event operation allows us to emit whatever event we like. With this new event dispatched on successful submission, closing the modal is as simple as adding an event listener to the modal’s Stimulus controller, like this:
open() {
  document.addEventListener("submit:success", () => {
    this.close()
  }, { once: true });
  // snip
}When the modal opens, an event listener is created, tuned to the event name that is dispatched from the cable_car payload.
Now when you submit the modal form, both the append and the dispatch_event operations are sent back in response to a successful form submission, Mrujs magic automatically performs the operations, and the submit:success event listener closes the modal.
Handling errors
Wonderful work stuff so far. Next we’ll deal with form errors using render operations again.
First, make it possible for a customer submission to have a validation error by adding validates_presence_of :name to models/customer.rb
With that in place, when the form is submitted with a blank name, the form submission will fail. When that happens, we want to render the customer form inside of the modal, with the validation errors attached.
To render errors in response to a failed submission, update the create method like this:
def create
  @customer = Customer.new(customer_params)

  if @customer.save
    html = render_to_string(partial: 'customer', locals: { customer: @customer })
    render operations: cable_car
      .append('#customers', html: html)
      .dispatch_event(name: 'submit:success')
  else
    html = render_to_string(partial: 'form', locals: { customer: @customer })
    render operations: cable_car
      .inner_html('#customer_form', html: html), status: :unprocessable_entity
  end
endIn the else branch, we again render the partial to a string and render operations. This time, since we don’t want the modal to close and we don’t need to replace the <form> element itself, we can just use one inner_html operation.
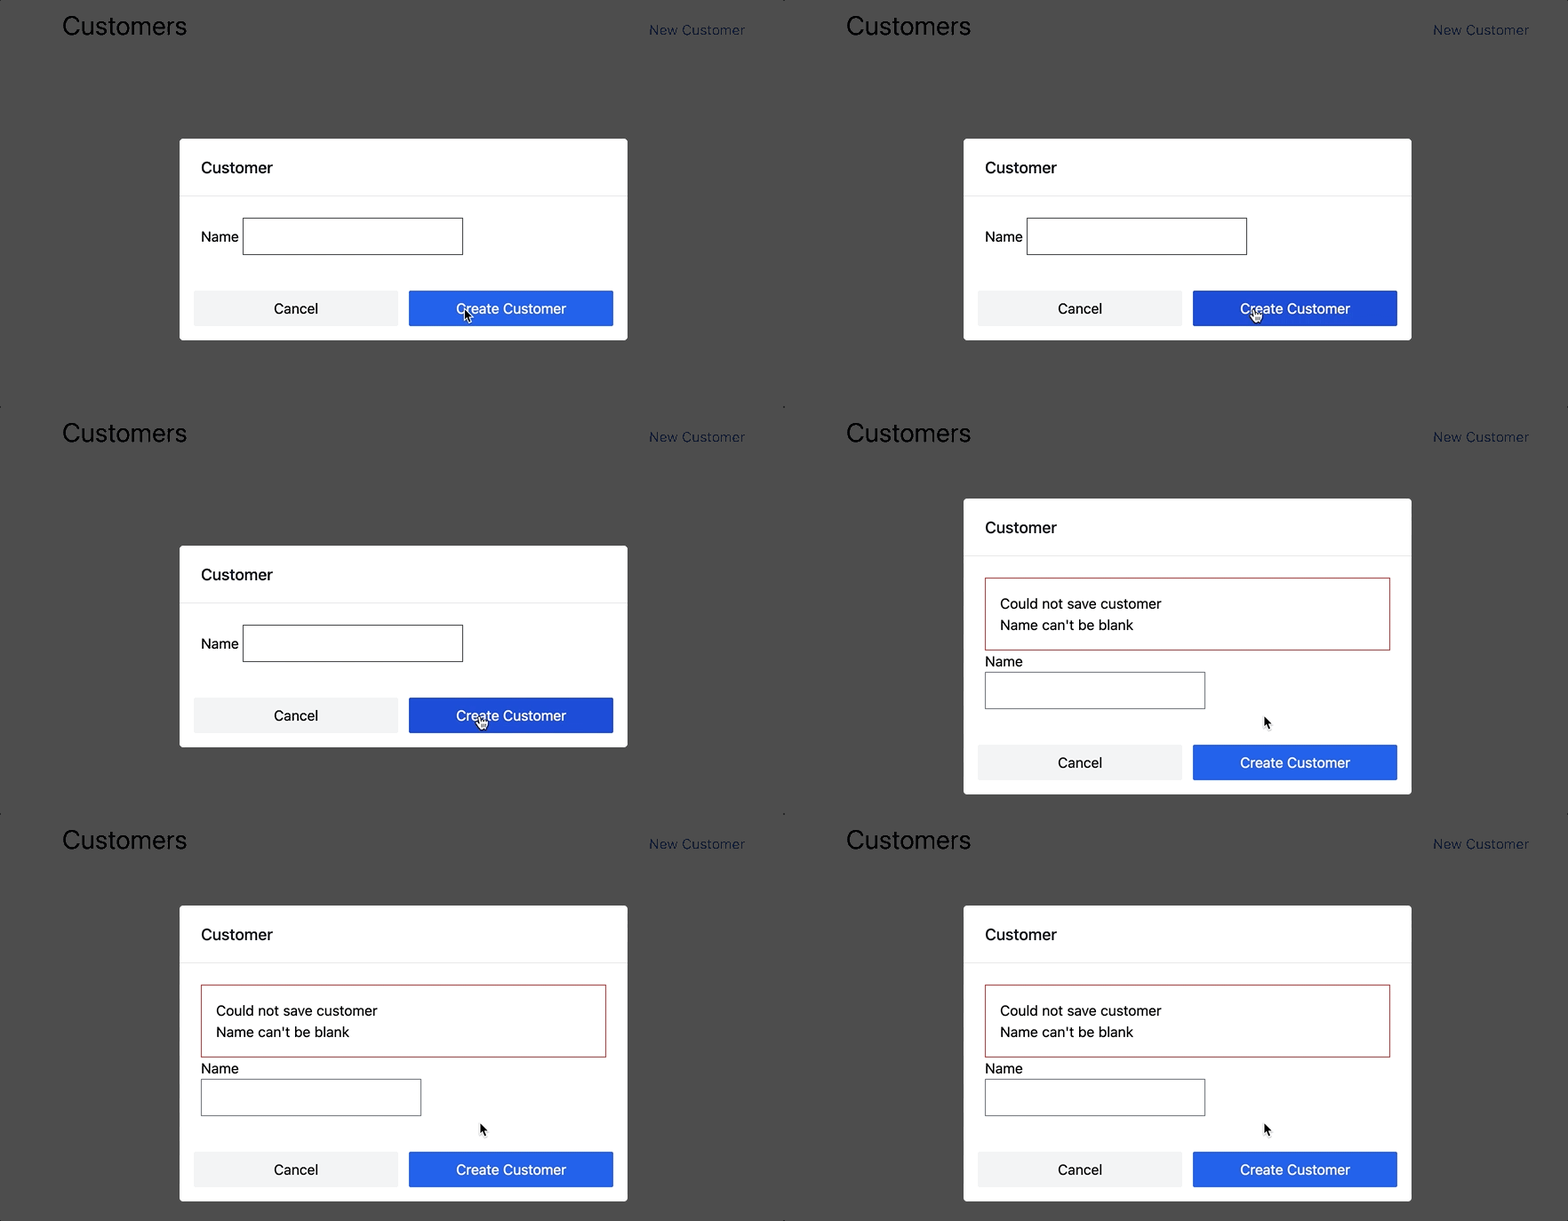
Open up the modal, submit a blank form, and see that the form is re-rendered with the errors as expected.

You’re a star for making it this far. Let’s finish up by seeing how easy it is to reuse this modal for editing customers, and adding some small optimizations to the modal opening.
Cable Car customer edits
A cool thing about the empty customer form modal is that we can reuse it with no modifications for editing existing customers, leaving us with just one tiny modal container that we can reuse for any number of modals on the page.
First, add a cable_car enabled modal link to the customer partial:
<div class="text-gray-700 border-b border-gray-200 w-full pb-2" id='<%= "customer-#{customer.id}" %>'>
  <%= link_to customer.name, edit_customer_path(customer), data: { remote: true, action: "click->modal#open" } %>
</div>Here we setup the relevant data attributes on the link and, on the wrapper div, we added a unique id. We’ll use that id to replace the content of the customer when the edit form is submitted.
Next up, back to the CustomersController to adjust the edit and update methods:
def edit
  html = render_to_string(partial: 'form', locals: { customer: @customer })
  render operations: cable_car
    .replace('#customer_form', html: html)
end

def update
  if @customer.update(customer_params)
    html = render_to_string(partial: 'customer', locals: { customer: @customer })
    render operations: cable_car
      .replace("#customer-#{@customer.id}", html: html)
      .dispatch_event(name: 'submit:success')
  else
    html = render_to_string(partial: 'form', locals: { customer: @customer })
    render operations: cable_car
      .inner_html('#customer_form', html: html), status: :unprocessable_entity
  end
endThis should look pretty familiar. The edit method is a mirror of the new method, and the update method is a mirror of the create method. Again, we dispatch the submit:success event when the customer is updated, otherwise the form re-renders with errors.
Finally, to use the same modal controller for every modal link on the page, we’ll move the data-controller="modal" declaration one level up the DOM tree. In customers/index.html.erb:
<div class="max-w-3xl mx-auto mt-8" data-controller="modal">
  <div class="flex justify-between items-baseline mb-6">
    <!-- Snip -->
  </div>
</div>With these changes in place, refresh the customers index page, click on a customer’s name, and see that updating the customer happens in a modal, and the customer is updated in place in the list on a successful form submission.
Optimizing modal opening
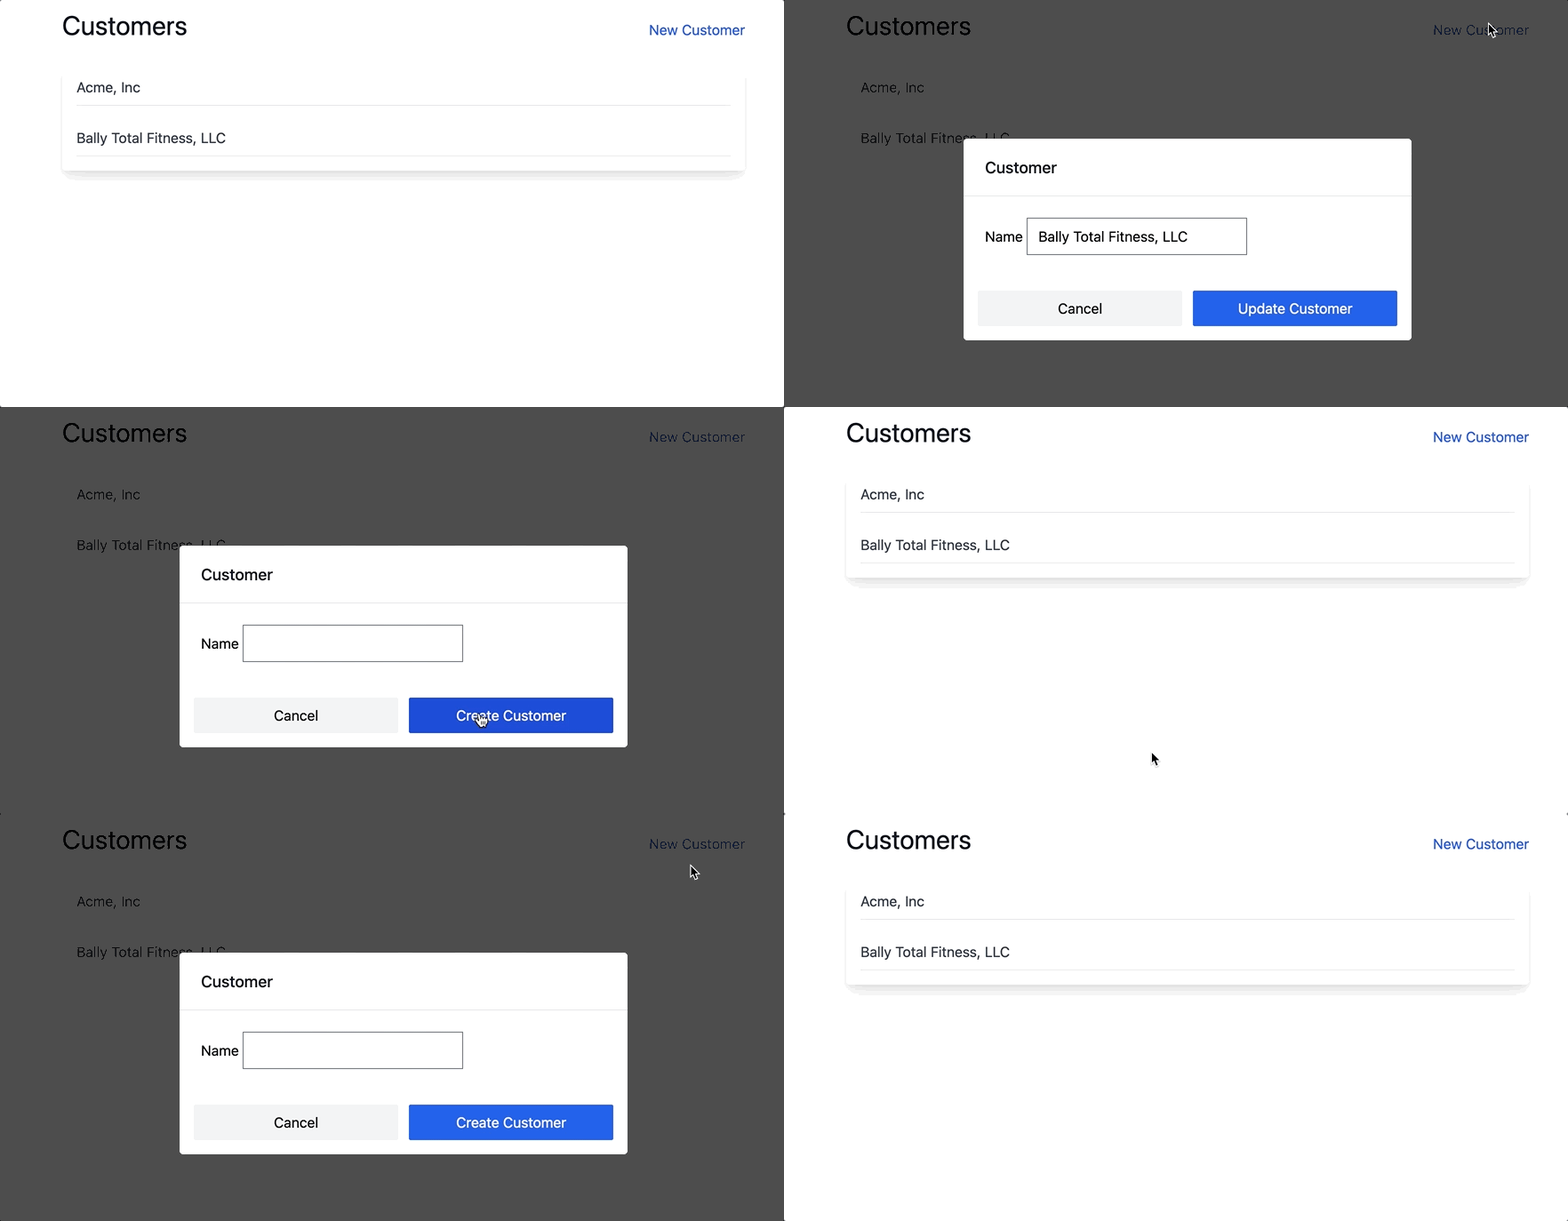
Something you may have noticed as you’ve worked through this guide is that the modal opens before the content from the server has rendered, causing a very brief flash as the modal opens and then quickly replaces the empty form or the form’s previous contents:

This happens because the modal opens instantly when a modal link is clicked but the round trip to the server to retrieve the form partial is not quite instant.
We have options for how to prevent this, including adding a loading state to the modal to make the re-render less jarring, but the method I’ll demonstrate is keeping the modal hidden until the content has been retrieved from the server. This gives us another chance to use CableReady and Stimulus, and that’s what we’re all here for, right?
First, add another event listener to the modal controller:
open() {
  document.addEventListener("modal:loaded", () => {
    this.containerTarget.classList.remove(this.toggleClass);
  }, { once: true });
  document.addEventListener("submit:success", () => {
    this.close()
  }, { once: true });

  document.body.classList.add('fixed', 'inset-x-0', 'overflow-hidden');
  document.body.insertAdjacentHTML('beforeend', this.backgroundHtml);
  this.background = document.querySelector(`#${this.backgroundId}`);
}Here we updated open to move the containerTarget.classList.remove call from happening instantly to happening in response to modal:loaded DOM event.
This change means that all of the modal links are now broken because the modal:loaded event never occurs and so containerTarget.classList.remove never runs and the modal container stays hidden.
We can fix the modal links by updating CustomersController like this:
def new
  html = render_to_string(partial: 'form', locals: { customer: Customer.new })
  render operations: cable_car
    .outer_html('#customer_form', html: html)
    .dispatch_event(name: 'modal:loaded')
end

def edit
  html = render_to_string(partial: 'form', locals: { customer: @customer })
  render operations: cable_car
    .outer_html('#customer_form', html: html)
    .dispatch_event(name: 'modal:loaded')
endIn both the new and edit methods, we again take advantage of CableReady’s chainable operations to dispatch modal:loaded after the outer_html is replaced.
With this change, the sequence of events when the user clicks on a modal link is:
- Request to server begins
- Open action is triggered
- Modal backdrop is applied to the page, no visible modal yet
- Form content is replaced
- Modal loaded event is dispatched
- Hidden class is removed from the modal, making it visible
This sequence happens rapidly enough in our circumstances for the user to barely notice the delay between the backdrop being applied and the modal displaying. In a production environment, you may find that a loading state for an immediately-opened modal is a more scalable option, but we’re here to learn about CableReady and Mrujs, not build a production application.
With these changes in place, the modal will open with the updated content already populated, eliminating the flash of old content.

The single modal connected div can be used to display any number of modals, serving as a way to reduce the initial page load in a more traditional application which might pre-render each edit modal.
Wrapping up
Today we learned how to build a server rendered modal form, powered by Stimulus, CableReady, and Mrujs.
Stimulus and CableReady are two powerful, battle-tested tools with a mature feature set that should be considered for any modern Rails application. CableReady can stand alone as a way to deliver real-time updates to end users through a variety of methods or it can be powered-up with StimulusReflex to deliver a SPA-link experience, minus the SPA.
Mrujs is a newer tool, under active development, and is intended to serve as a modern, stable replacement for rails/ujs, which is no longer under active development and which will be deprecated when Rails 7 releases.
In addition to the tight integration with CableReady’s Cable Car that we saw today, Mrujs gives you access to simple confirmation dialogs, disabled links, and the other niceties from Rails UJS, in a modern package.
An important note before we go: we could build a very similar user experience with a variety of tools in the Rails ecosystem, including Turbo Streams (here’s a guide for that).
While the full Hotwire stack can deliver this experience with about the same amount of effort, the power and flexibility of CableReady’s chainable operations makes CableReady + Mrujs a better fit for this particular use case than the full Hotwire stack, in my very, very humble opinion.
What’s really exciting about this is that as Rails developers, our cups are overflowing with powerful tools to build real-time, reactive applications. That means we all win, no matter which tool we reach for most often.
Continue your journey with CableReady, Stimulus, and Mrujs with these resources:
- The CableReady documentation
- The Stimulus docs
- The Mrujs docs
- Explore the StimulusReflex documentation when you’re ready
- Join the StimulusReflex discord if you get stuck with CableReady or StimulusReflex
- (Shameless plug) Subscribe to my monthly newsletter, Hotwiring Rails, to stay up to date on the latest on building modern, performant applications with Rails and tools like CableReady and Stimulus
That’s all for today.
As always, thanks for reading!