Sort tables (almost) instantly with Ruby on Rails and Turbo Frames
19 Sep 2021One of the wonderful things about working in Rails in 2021 is that we are spoiled for options when it comes to building modern, reactive applications. When we need to build highly interactive user experiences, we don’t need to reach for JavaScript frameworks like Vue or React — the Rails ecosystem has all the tools we need to deliver exceptionally fast, efficient, and easy-to-maintain front ends.
Yesterday, I published an article demonstrating a simple implementation of a sortable table with StimulusReflex. Today, we’re going to build the same experience with Turbo Frames instead.
Why build the same thing with two different tools? Because we have great options to choose from in Rails-land, and understanding each option is a great place to start when considering which tool is right for you and your team.
Like yesterday, our application is going to allow users to view a table of players. They’ll be able to click on each header cell to sort the table in ascending and descending order.
Sorting will happen very quickly, without a full-page turn, and we won’t be writing any custom JavaScript or doing anything outside of writing ordinary Ruby code and ERB templates.
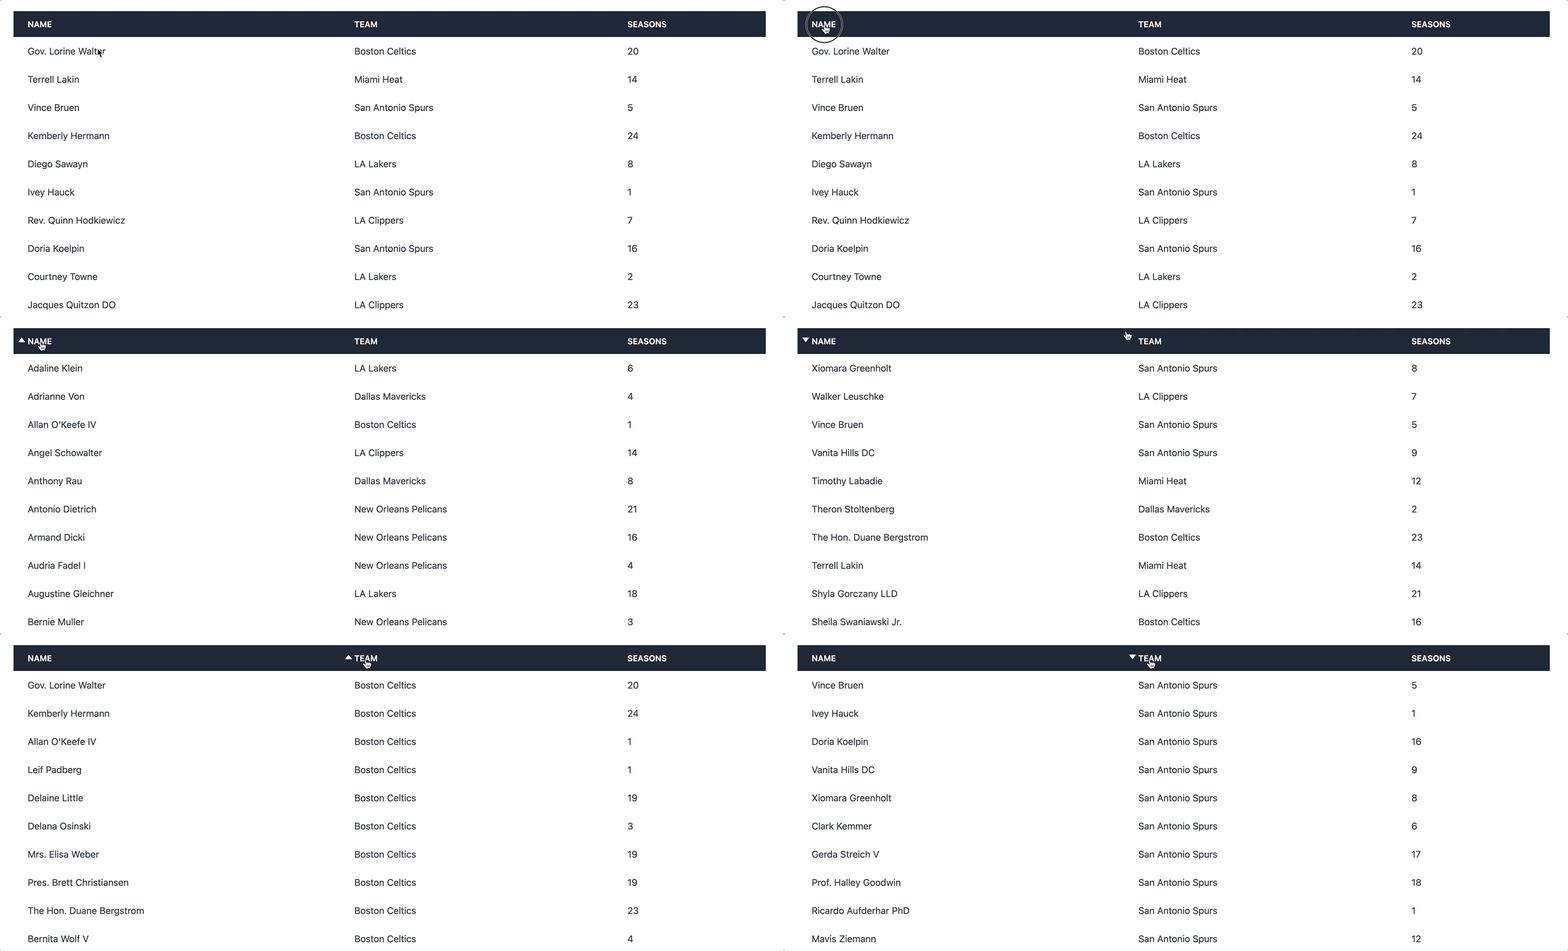
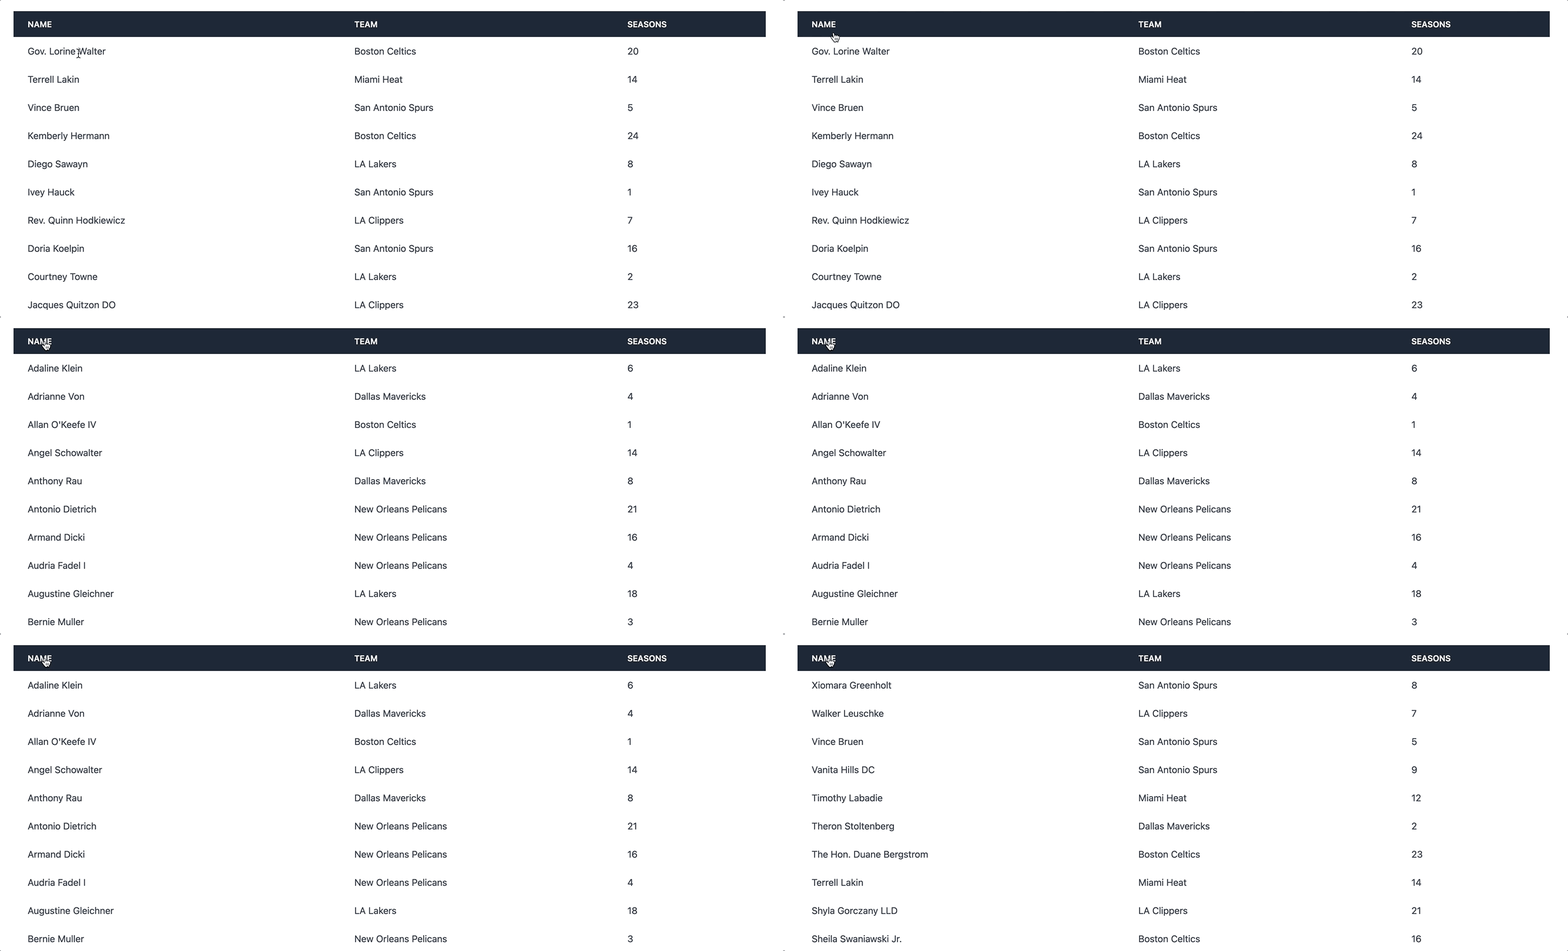
When we’re finished, the application will work like this:

You can demo the application for yourself on Heroku (the free dyno might need a moment to wake up when you visit it) or view the complete source on Github.
This article assumes that you are comfortable building applications with Ruby on Rails and may be difficult to follow if you have never worked with Rails before. Previous experience with Turbo Frames is not required.
Let’s get started!
Setup
To begin, we’re going to create a new Rails application, skipping webpacker in favor of the newly released css and jsbundling gems.
If you prefer skipping the setup steps, you can clone down the example repo from Github. The main branch is pinned to the end of the setup process and ready for you to start building.
This article is being written using Rails 6.1. When Rails 7 releases, the install command listed below will change. Until then we need to manually add the bundling gems to our Gemfile.
First, from your terminal:
rails new player_sort_frames_1 --skip-javascript --skip-webpack-install --skip-turbolinks
cd player_sort_frames_1
bundle add cssbundling-rails jsbundling-rails hotwire-rails faker
rails g model Team name:string
rails g scaffold Player name:string team:references seasons:integer
rails db:migrateHere, in addition to the bundling gems, we added Faker to our project to allow us to quickly add seed data to the database and added a Team model and Players resource to our project.
The core of our application will be a list of players, we won’t interact with Teams directly so we skip adding a controller and views for Teams.
Next up, we’ll use the new bundling gems to install webpack to handle our JavaScript and Tailwind for CSS. From your terminal:
rails javascript:install:webpack
rails css:install:tailwindFinally, we’ll wrap up setup by installing Hotwire in our application. Technically, we only need Turbo for this project, but having Stimulus setup won’t hurt anything. One more time, from your terminal:
rails hotwire:installWith everything installed, you can start up the server and build your assets with bin/dev from your terminal.
Build table layout
We’ll begin by updating the players index page to display a nicely styled table of all of the players in the database. Rails’ scaffolding gets us most of the way there, but instead of rendering the players table in index.html.erb we’ll move the table to a partial.
This partial will come in handy later when we use Turbo Frames to sort the list of players.
First, update app/views/players/index.html.erb like this:
<div class="max-w-7xl mx-auto mt-12">
  <%= render "players", players: @players %>
</div>The index is now rendering a partial (players) that hasn’t been created yet, so we’ll create that partial next.
From your terminal:
touch app/views/players/_players.html.erbAnd fill the partial in like this:
<div class="shadow overflow-hidden rounded border-b border-gray-200">
  <table class="min-w-full bg-white">
    <thead class="bg-gray-800 text-white">
      <tr>
        <th id="players-name" class="text-left py-3 px-6 uppercase font-semibold text-sm hover:cursor-pointer">
          <span>Name</span>
        </th>
        <th id="players-team" class="text-left py-3 px-6 uppercase font-semibold text-sm hover:cursor-pointer">
          <span>Team</span>
        </th>
        <th id="players-seasons" class="text-left py-3 px-6 uppercase font-semibold text-sm hover:cursor-pointer">
          <span>Seasons</span>
        </th>
      </tr>
    </thead>

    <tbody class="text-gray-700">
      <% players.each do |player| %>
        <tr>
          <td class="text-left py-3 px-6"><%= player.name %></td>
          <td class="text-left py-3 px-6"><%= player.team.name %></td>
          <td class="text-left py-3 px-6"><%= player.seasons %></td>
        </tr>
      <% end %>
    </tbody>
  </table>
</div>This partial simply renders a table that contains a header row and then rows for each player in the players variable. The classes are all built-in Tailwind classes that are not integral to the function of the application.
Now we’ve got a nice looking table ready to display our players, but no players in the database! Let’s fix that by creating enough seed data that we can see sorting in action.
First, update db/seeds.rb:
['Dallas Mavericks', 'LA Clippers', 'LA Lakers', 'San Antonio Spurs', 'Boston Celtics', 'Miami Heat', 'New Orleans Pelicans'].each do |name|
  Team.create(name: name)
end

100.times do
  Player.create(name: Faker::Name.name, team: Team.find(Team.pluck(:id).sample), seasons: rand(25))
endAnd then from your terminal, seed the database:
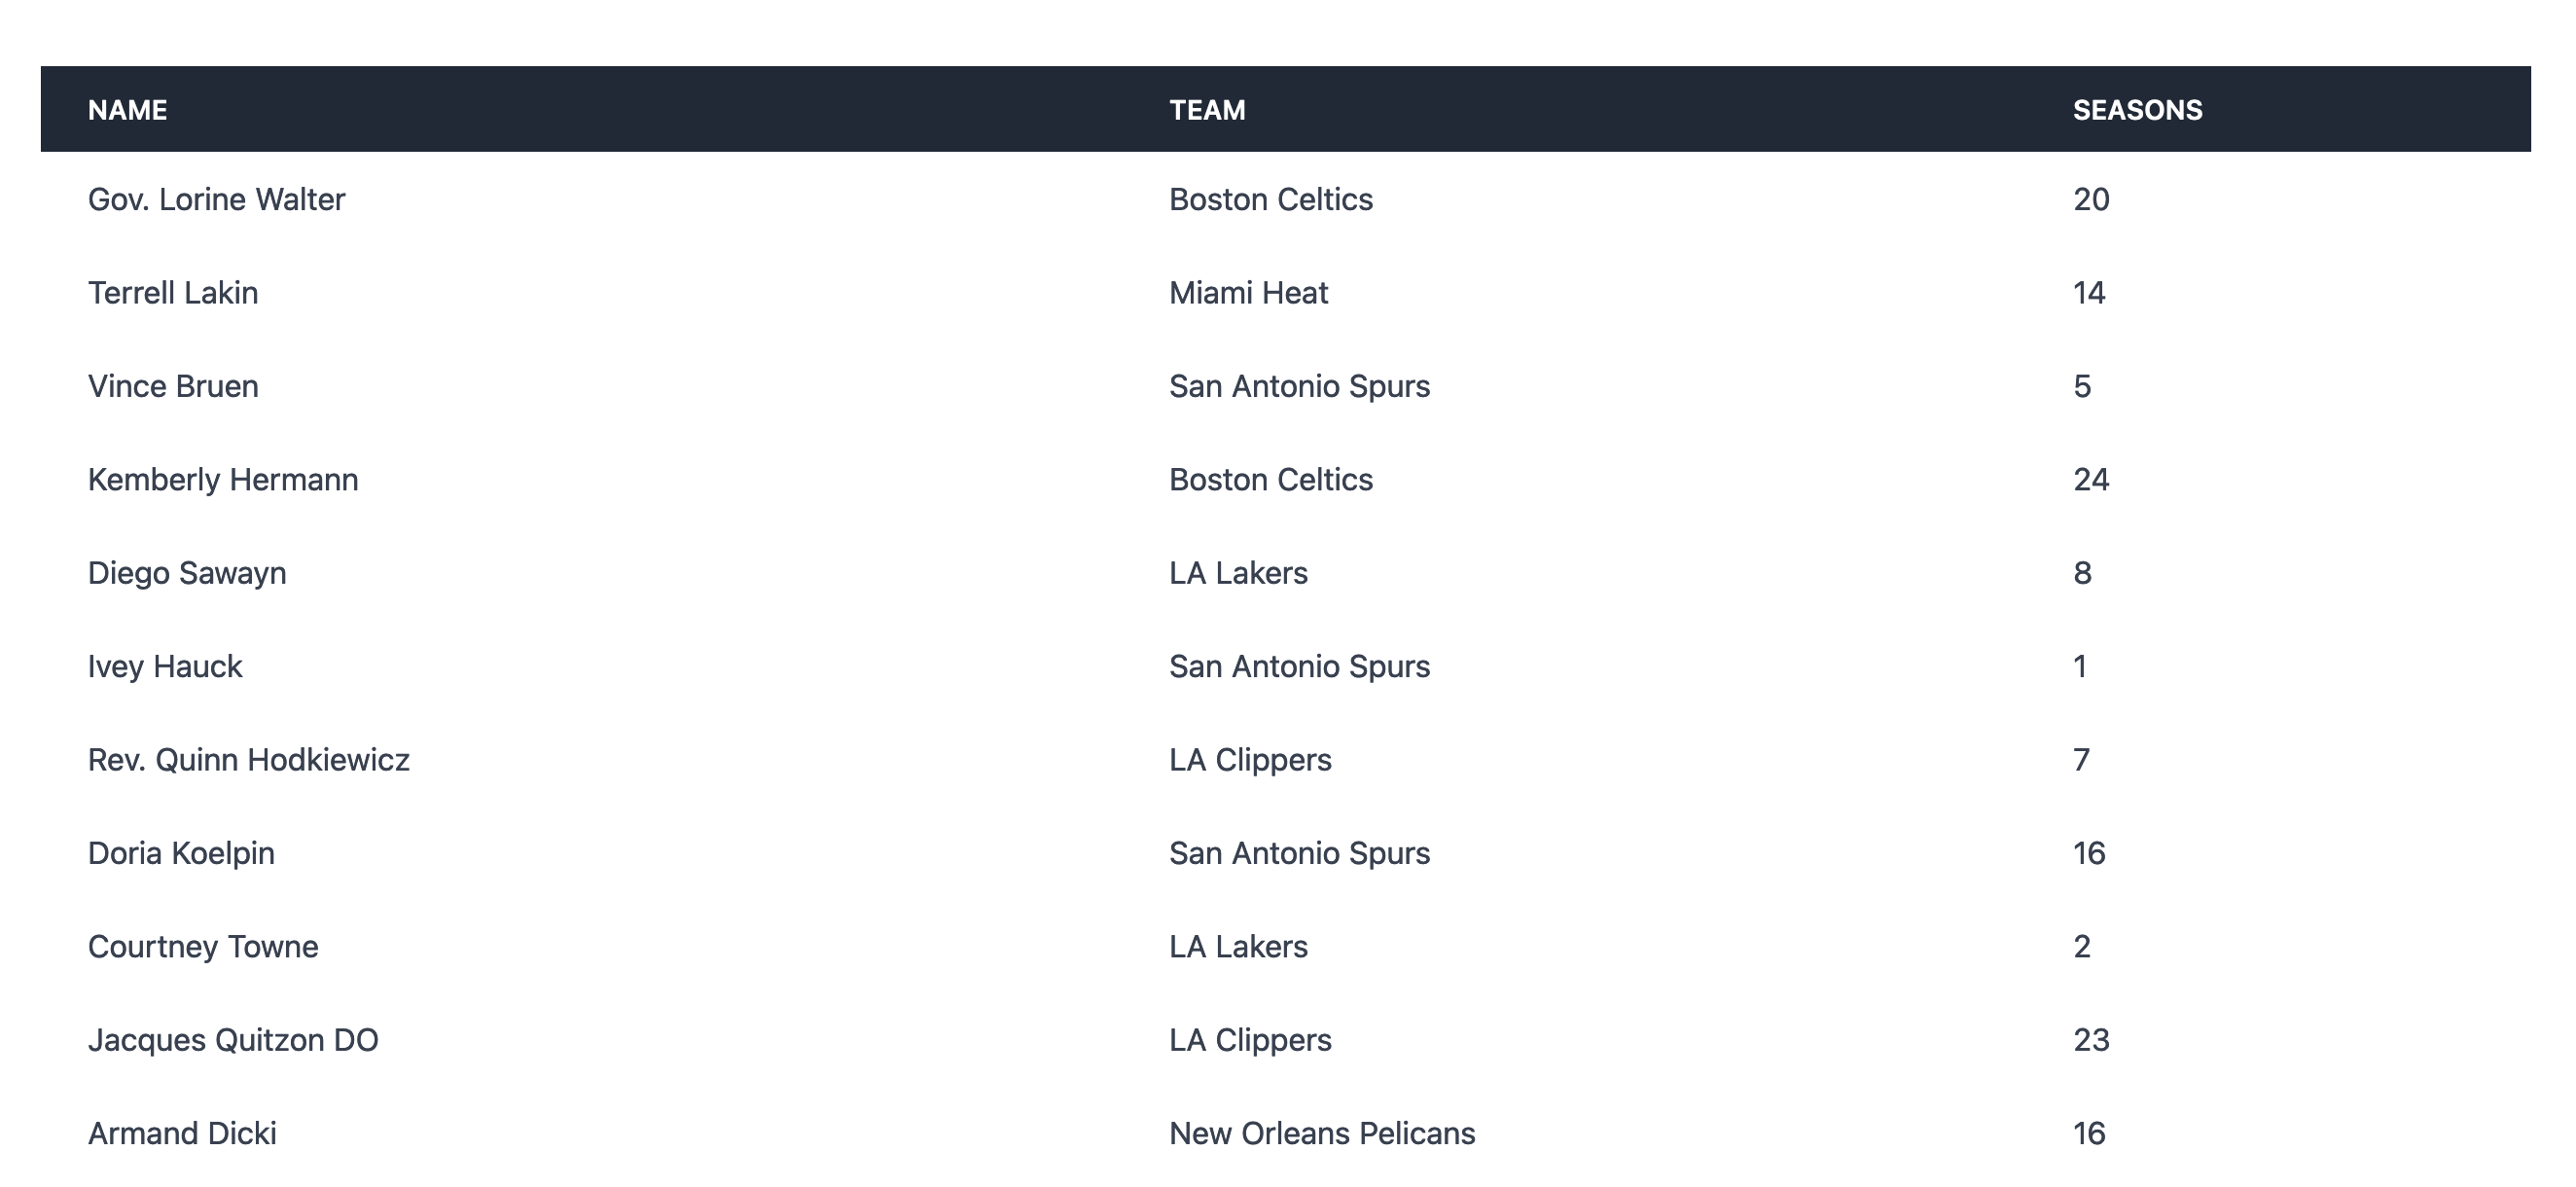
rails db:seedIf you haven’t already, boot up the app and build assets with bin/dev from your terminal, and then head to localhost:3000/players and see the list of randomly generated players, ready to sort.

Now that we’ve got our table populated and displaying, let’s start on the fun stuff by making the table sortable with Turbo Frames.
Add turbo frame sorting
As a reminder, our goal is for users to be able to click on a table header to sort the table by that column. We want sorting to happen without a page turn, and we want to use a Turbo Frame to update the list of players in the UI.
To start, we’ll convert the wrapper div in the players partial to a turbo_frame_tag with an id of players and the same classes that the wrapper div had. In app/views/players/_players.html.erb
<%= turbo_frame_tag "players", class: "shadow overflow-hidden rounded border-b border-gray-200" do %>
  <table class="min-w-full bg-white">
  <!-- snip -->
  </table>
<% end %>Don’t forget to replace the closing </div> with the <% end %> tag!
Now that the players turbo frame wraps the content of the table, links inside of this frame will automatically attempt to replace the content of the turbo frame with the content they receive from the server.
We’ll come back to this concept in a minute, but first, let’s build out the remainder of the code we need for the first pass at sorting the table.
Next, inside of the players partial still, update the table header like this:
<thead class="bg-gray-800 text-white">
  <tr>
    <th id="players-name" class="text-left py-3 px-6 uppercase font-semibold text-sm hover:cursor-pointer">
      <%= sort_link(column: "name", label: "Name") %>
    </th>
    <th id="players-team" class="text-left py-3 px-6 uppercase font-semibold text-sm hover:cursor-pointer">
      <%= sort_link(column: "teams.name", label: "Team") %>
    </th>
    <th id="players-seasons" class="text-left py-3 px-6 uppercase font-semibold text-sm hover:cursor-pointer">
      <%= sort_link(column: "seasons", label: "Seasons") %>
    </th>
  </tr>
</thead>Here we’ve replaced the static text labeling each column with a call to the sort_link helper method, passing in a column and a label for each header cell.
This helper method doesn’t exist yet, so let’s add that next. In app/helpers/players_helper.rb:
module PlayersHelper
  def sort_link(column:, label:)
    link_to(label, list_players_path(column: column))
  end
endsort_link renders a standard Rails link_to, using label to display the link to the user, and column to append a parameter to the generated URL.
The link_to points to list_players_path, which we haven’t defined yet. Let’s do that next, in routes.rb:
resources :players do
  collection do
    get 'list'
  end
endAnd finally, we need to update our controller to define an action for the new list route we’ve added.
In app/controllers/players_controller.rb, add a new list method, like this:
def list
  players = Player.includes(:team).order("#{params[:column]} asc")
  render(partial: 'players', locals: { players: players })
endHere we’ve defined a new controller action that queries the database for all of the players, includes the teams table in the query, and orders the players using the value of params[:column].
The includes(:team) is necessary both to allow sorting players by their team name and for performance, since the players partial makes a call to player.team.name to display the players name on each row.
Once the players are retrieved, the players partial is rendered and sent back to the browser.
With the controller update in place, refresh the page, click on a column header, and, if all has gone well, you should see that the list of players is updated (almost) instantly with the correct column sorting applied.
When you sort by a column, you should see output in your server logs like this:
Started GET "/players/list?column=seasons"
Processing by PlayersController#list as HTML
  Parameters: {"column"=>"seasons"}
  Player Load (0.5ms)  SELECT "players".* FROM "players" ORDER BY seasons asc
  ↳ app/views/players/_players.html.erb:18
  Team Load (0.2ms)  SELECT "teams".* FROM "teams" WHERE "teams"."id" IN (?, ?, ?, ?, ?, ?, ?)  [["id", 3], ["id", 1], ["id", 2], ["id", 6], ["id", 4], ["id", 5], ["id", 7]]
  ↳ app/views/players/_players.html.erb:18
  Rendered players/_players.html.erb (Duration: 5.9ms | Allocations: 3994)
Completed 200 OK in 7ms (Views: 5.6ms | ActiveRecord: 0.6ms | Allocations: 4224)Nice work so far, let’s pause here to step back and talk about how this all ties together.
We started by wrapping the players table in a Turbo Frame with an id of players. Then we added a link to each of the header cells, pointing to players/list.
Because the link is wrapped in a turbo frame, when the response is sent back from the server, Turbo scans the response for a turbo frame with the same id (players) and replaces the existing frame content with the new frame content.
In our case, this means that the updated list of players, rendered by players/list, replaces the content of the players table without touching the rest of the page.
This use of Turbo Frames, to replace the content of a matching frame, is the simplest approach to using Turbo Frames.
In more advanced cases, we can have a link inside of a frame break out of a frame, with target=_top or use data-turbo-frame to tell Turbo that a link from outside of a frame should target that frame.
Turbo Frames enable us to make fast, efficient page updates without adding significant complexity to our code.
Now that we’ve got a little more context for how Turbo Frames are enabling sorting in our application, let’s finish up by adding the ability to sort in both ascending and descending order and inserting a visual indicator when sorting is applied.
Add descending sorting
We want users to be able to sort in descending order by clicking on the same column header twice in a row. The first click will sort in ascending order, the next click will sort in descending order.
Here’s a demonstration of the desired user experience for this section of the article:

First, we’ll modify the sort_link helper that we added in the last section to send a direction as well as a column in the list request.
In app/helpers/players_helper.rb:
def sort_link(column:, label:)
  if column == params[:column]
    link_to(label, list_players_path(column: column, direction: next_direction))
  else
    link_to(label, list_players_path(column: column, direction: 'asc'))
  end
end

def next_direction
  params[:direction] == 'asc' ? 'desc' : 'asc'
endsort_link now adds a second parameter into the link_to. The new direction parameter is set to the value of the next_direction helper method if we are generating the sort link for a column that is being used for sorting; otherwise, direction is set to ascending.
next_direction simply inverts the current sort direction so the sort direction changes with each click.
Next we’ll update the list method in players_controller.rb to use the new direction parameter in the order clause:
def list
  players = Player.includes(:team).order("#{params[:column]} #{params[:direction]}")
  # snip
endWith this change in place, we can now sort our table in either direction. Incredible stuff, nice work making it this far!
One more set of changes left: Giving users feedback in the UI that sorting is active.
Add visual indicator of sort direction
Our final task is to add an indicator next to the column name when that column is being used to sort the table. The indicator will be a small triangle, pointing up when sorting in ascending order and down when sorting in descending order.
We’ll start by updating the table header in the players partial like this:
<thead class="bg-gray-800 text-white">
  <tr>
    <th id="players-name" class="text-left py-3 px-6 uppercase font-semibold text-sm hover:cursor-pointer relative">
      <%= sort_indicator if params[:column] == "name" %>
      <%= sort_link(column: "name", label: "Name") %>
    </th>
    <th id="players-team" class="text-left py-3 px-6 uppercase font-semibold text-sm hover:cursor-pointer relative">
      <%= sort_indicator if params[:column] == "teams.name" %>
      <%= sort_link(column: "teams.name", label: "Team") %>
    </th>
    <th id="players-seasons" class="text-left py-3 px-6 uppercase font-semibold text-sm hover:cursor-pointer relative">
      <%= sort_indicator if params[:column] == "seasons" %>
      <%= sort_link(column: "seasons", label: "Seasons") %>
    </th>
  </tr>
</thead>Here we’ve added a conditional call to sort_indicator into each header cell.
Since we only want to add the indicator when the column is being used to sort the table, we use if params[:column] to skip the sort_indicator call on inactive columns.
We also added relative to the <th> elements class lists because the sort indicator will be absolutely positioned inside of the header cell.
Next up, we’ll define sort_indicator in app/helpers/players_helper.rb:
def sort_indicator
  tag.span(class: "sort sort-#{params[:direction]}")
endsort_indicator simply returns a span with a class that matches the current sort direction, read from params[:direction]
Finally, we’ll add css so our sort indicator isn’t just an invisible span on the page.
For convenience, we’ll insert the css right into app/assets/stylesheets/application.css
.sort {
  position: absolute;
  top: 1rem;
  left: 0.5rem;
  width: 0;
  height: 0;
  border-left: 6px solid transparent;
  border-right: 6px solid transparent;
}

.sort-desc {
  border-top: 8px solid #fff;
}

.sort-asc {
  border-bottom: 8px solid #fff;
}With the CSS added and our new sort_indicator helper defined, refresh the page, click on the column headers, and see that the table is sorted and a visual indicator is shown for the current column and sort direction:

Great job following along, we’ve reached the end of the code for today!
Wrapping up
Today we learned how to build a sortable table with Rails and Turbo Frames. Our table can be sorted without a page turn, and we built the interface using basic set of tools familiar to any Rails developer.
While our table only supports sorting today, our frame-based approach can be enhanced to support filtering and searching without deviating from the core concept of using Turbo Frames to display and update the table.
Turbo Frames, along with the rest of the Hotwire stack, give Rails developers the ability to quickly build fast, modern user experiences without adding the weight and complexity that can come with JavaScript frameworks.
You’ll note that I did not compare the approach in this article directly to the approach in yesterday’s article where we built the same UI with StimulusReflex. Rather than attempting a direct, side-by-side comparison, I prefer presenting both options as standalone projects that show how to build simple experiences using each tool so that readers can learn how each tool works, begin experimenting, and see which feels right.
Both StimulusReflex and Turbo (Frames and Streams) can deliver world-class user experiences in production applications while providing an unbeatable developer experience. The right choice for you and your team is almost certain to be the option that your team feels most comfortable with and most productive in.
Whichever routet you choose, with the Hotwire stack, StimulusReflex, and CableReady available, Rails is well-positioned for the future.
If you’re ready to go further with on your Turbo journey, here are a few places to start:
- Review the Turbo documentation
- Dive in to the Turbo Rails source code on Github
- Spend time with Stimulus, the other side of the Hotwire stack
- Learn from the community in the Hotwire discussion forum
- Join the StimulusReflex discord, where folks will happily help you learn more about building reactive web applications with Rails
That’s all for today. As always, thanks for reading!